|
Other guides:
No soldering or programming. Simply power it up and follow this 3 step configuration guide and you will have a wireless sensor transmitting readings
to your personal dashboard that is accessible through the internet.
You can configure the WIFI sensor using any device that supports WIFI and an internet browser.
In this example we will use a desktop computer. 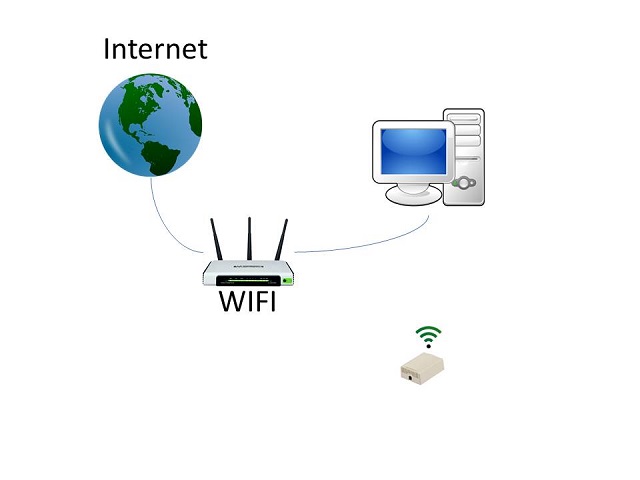
Step 1 : Connect to the WIFI Sensor
The first step is to connect the desktop PC to the WIFI sensor.
Power up the WIFI sensor and verify the internal Red light is on. You will now use your computer (or device) to connect to the Sensor WiFi.
Look for a WiFi Name that starts with PEP followed by some numbers.
These numbers are the unique ID of your sensor. Connect to the sensor WiFi use the default password:
Password: PrivateEyePi.
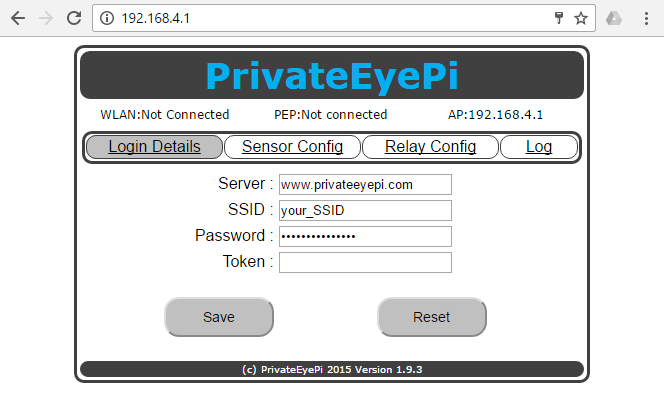
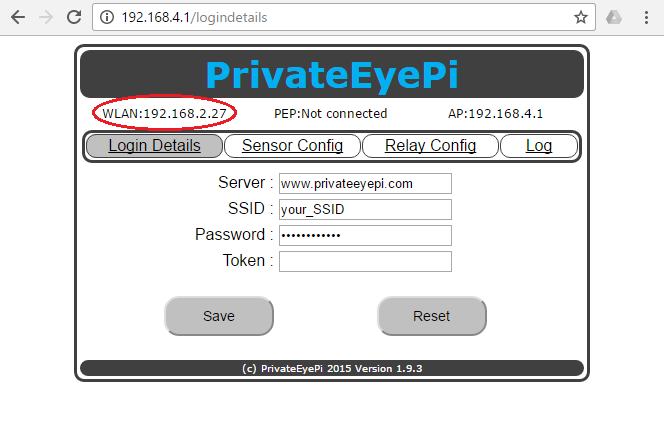
Wait a few seconds for the WIFI temperature sensor to connect to the WIFI router. Click on the "Login Details" menu option to refresh the screen.
Once connected you will see the IP address that was given to the WIFI sensor, as shown in the next image.
In the example below it shows 192.168.2.27, but yours will be different. Your WIFI sensor is now connected to the internet.
Step 3 : Connect to PrivateEyePiThe next step is to connect your sensor to the PrivateEyePi server so you can monitor the sensor or create alerts. If you have not registered an account with PrivateEyePi, go to
http://www.privateeyepi.com and click on "Create User". This is a free online service.
Under the User Menu, select the Token tab to obtain your token.
The token is used to authorize the sensor to send information to the www.privateeyepi.com server.

Click on the Copy Button.
Now open a new browser tab and enter http://[WLAN] where [WLAN] is the number you wrote down and the end of Step 2.
This should open the Sensor login Page. If the Sensor Login page does not open, review steps above or start over.
On the Sensor Login page, paste the token (use Control V, or right mouse click and paste) into the token field as shown in the below diagram.
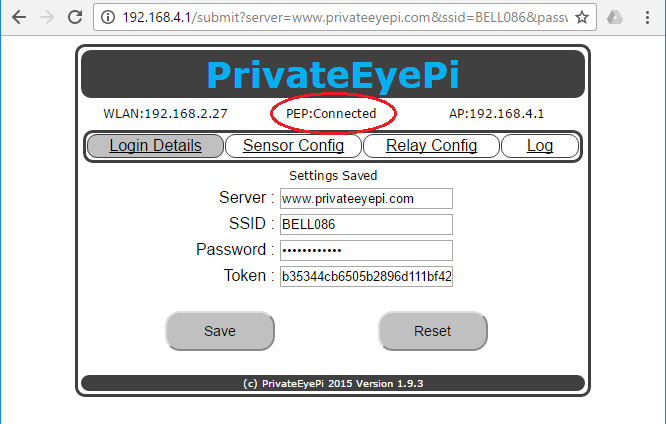
Click "Save" and again wait for a few seconds for the WIFI sensor to connect, clicking on the "Login Details" menu option to refresh the screen. Once connected you will see "PEP: Connected" as shown by the red circle in the image above.
|
|
|
|
|
|
