|
How it works
The siren will sound when the alarm is triggered. The siren will silence when the zone is reset using the alarm dashboard or after a predefined time-out.
What you need
All parts can be purchased from the PrivateEyePi Store
Electronics
As per Figure 1 You will be using a transistor to switch the siren on and off. You can also use a relay but I have chosen the PN222A because it is my “go to” Raspberry Pi switch. It can handle switching a DC current of up to 40V and 600mA. This is more than enough for most Raspberry Pi projects. A transistor is very useful for switching. It has three pins. The two outer pins are called the emitter and collector, and the middle pin is called the base. How it works is when a voltage if supplied to the base (middle pin) then it allows current to flow between the emitter to the collector.
Word of caution: do not use this transistor to switch high voltage AC current.
When and if, you choose to buy an externally powered alarm system siren, make sure that you check the voltage and the current (amps). You want to look for a siren that is under 40V DC and .6A or 600mA. You will need to have an external power supply. Do not use the Raspberry Pi power to supply a current to the alarm system siren.
In this project we will use the buzzer which can be powered by the Rpi 3V power supply.
Figure 1 - Solderless breadboard diagram for the PrivateEyePi siren 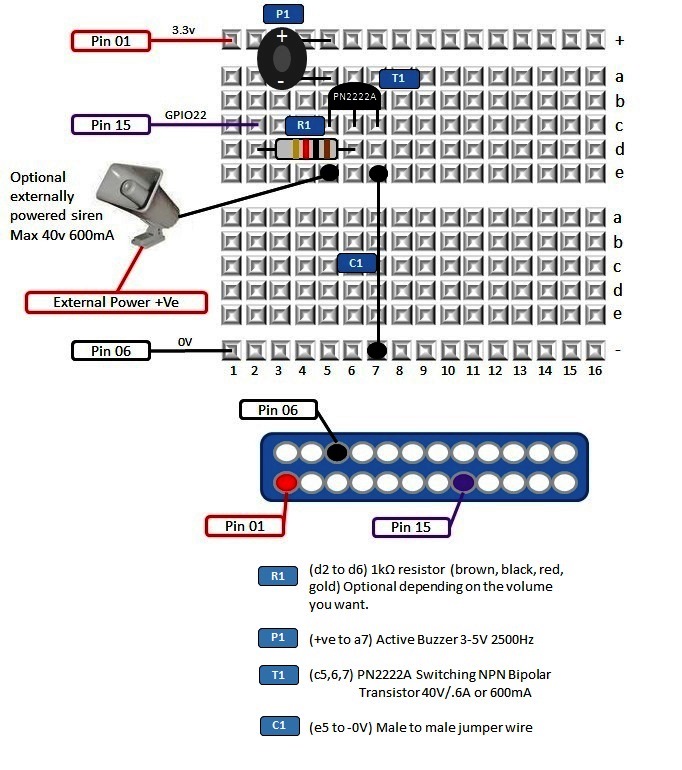
Software
If you have not already set up the alarm system, you should do this first and then return to this step.
Edit the globals.py file:
cd /home/pi/pep
sudo nano globals.py
As per Figure 2 set the UseSiren variable to TRUE and configure the pin
number that the siren is connected to. This is the pin number not the GPIO
number (the pin numbers are 1-32 for each of the Rpi GPIO pins). See this
diagram for more details on pin numbers. The default siren pin number is 11, but
you can change it to any other free GPIO pin.
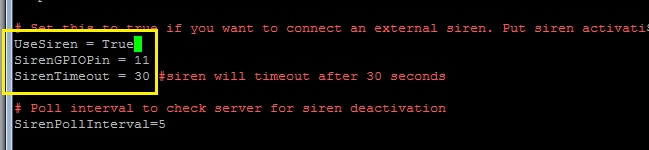
Figure 2 - Siren settings in the alarm.py file
Save the file by typing CTRL-X Y ENTER Start up the alarm by typing: If you automated you alarm then you should kill the background process and let the cron job restart it for you. You can kill the background process by typing: Then look for alarm.py in the process list and make not of the process number. Kill the process by typing: Where [processnumber] is the number you made a note of from the “ps ax” command. If you have not already automated the alarm so it restarts itself whenever you restart the Raspberry Pi or whenever the program stops running then follow this tutorial. So now you should be back up and running. Test the siren by activating a zone on the dashboard and then triggering the alarm. The alarm should sound either until the SirenTimeout is reached (default 30 seconds) or you deactivating the zone from the dashboard. You can set the SirenTimeout setting in the alarm.py file.
I hope you have enjoyed this project. For support join the support forum on the home page and post questions there. |
Home > Home Alarm System project >