|
Other guides:
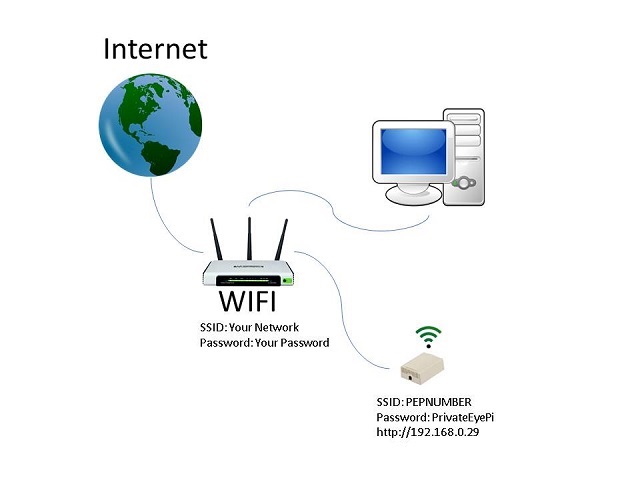
No soldering or programming. Simply power it up and follow this 3 step configuration guide and you will have a wireless sensor transmitting readings to your personal dashboard that is accessible through the internet.
You can configure the WIFI sensor using any device that supports WIFI and an internet browser. In this example we will use a desktop computer.
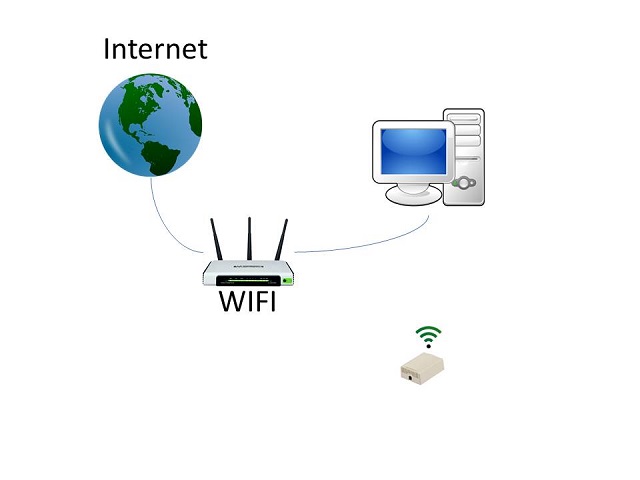
Step 1 : Connect to the WIFI Sensor
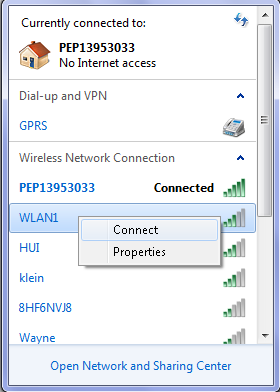
The first step is to connect the desktop PC to the WIFI sensor. Power up the WIFI sensor and using your computer (or device) look for a WIFI connection tat start with PEP followed by some numbers. These numbers are the unique ID of your sensor. Connect to the sensor using the default password:
Password: PrivateEyePi.
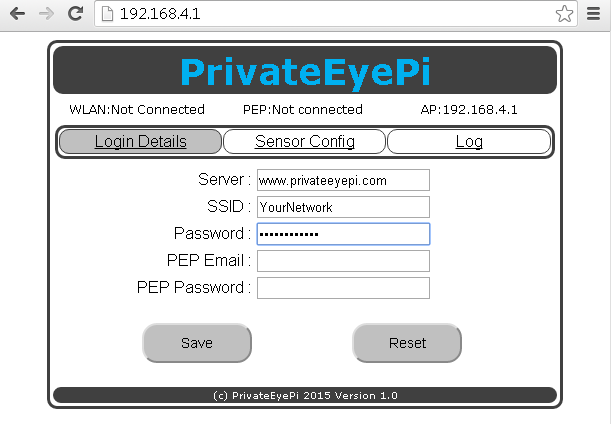
Check the version at the bottom of the screen. If it is version 1.9.3 or above then switch to the
latest config guide.
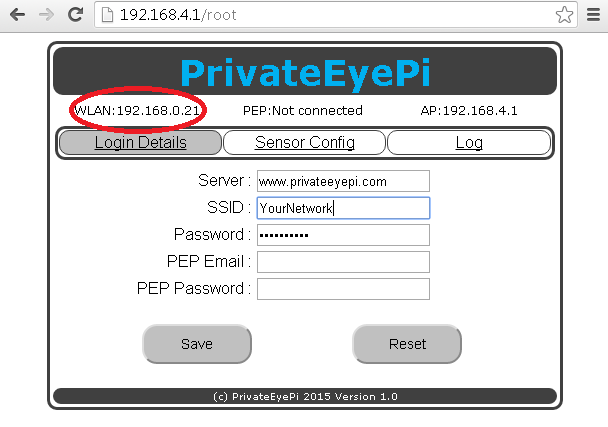
Wait a few seconds for the WIFI temperature sensor to connect to the WIFI router. If required, click on the "Login Details" menu option to refresh the screen. Once connected you will see the IP address has given to the WIFI sensor, as shown in the next image. In the example below it shows 192.168.0.21, but yours will be different. Your WIFI sensor is now connected to the internet.
 Step 3 : Connect to PrivateEyePiThe next step is to connect your sensor to PrivateEyePi so you can monitor the sensor or create alerts. If you have not registered an account with PrivateEyePi, go to http://www.privateeyepi.com and click on "Create User". This is a free online service.
Now enter your PrivateEyePi email and password as shown in the next image.

Next click on the "Sensor Config" menu option and click on "Send To server" and set the send interval. In the example below it is set to 300 seconds, so every 5 minutes a temperature reading is sent to the server. Click on save.
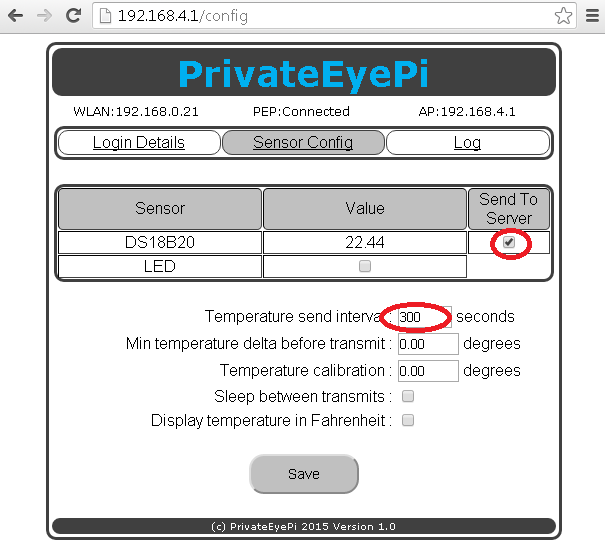 If you have the WIFI Temperature and Humidity Sensor then the config
screen will look as follows:
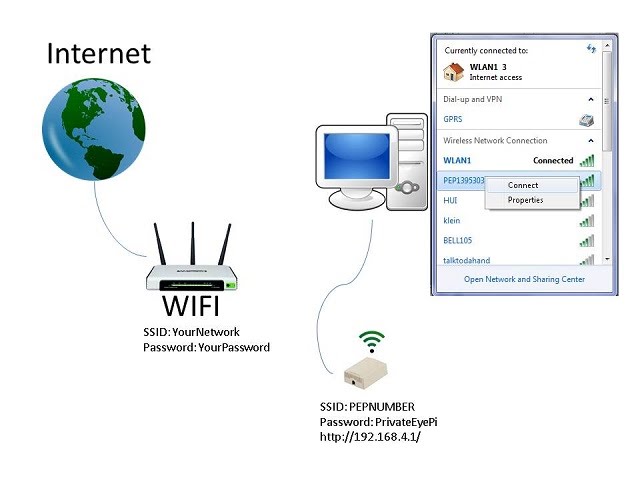
2ff5.jpg?attredirects=0) You can now connect your computer or device back to your WIFI router so that you can access the internet.
My network is called WLAN1 (shown below) but you will connect to your network name.
  You can now navigate to the WIFI sensor through your WIFI network using its assigned IP address
(in the above image it is 192.168.0.21 - yours will be different).
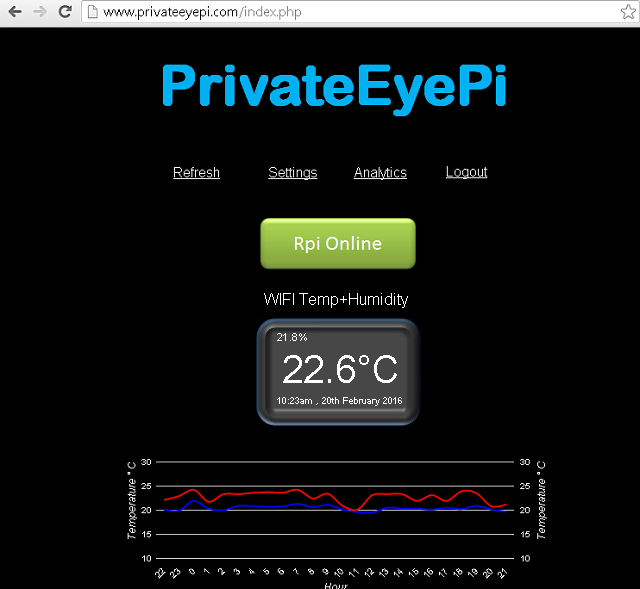
Now navigate to PrivateEyePi and login to the dashboard. You will see the temperature reading and graph labelled "WIFI Temperature" as default. This can be changed by clicking on Settings, and then Location.
 WIFI Temperature Dashboard
 WIFI Temperature and Humidity Dashboard
|
WIFI Sensor Getting Started Guide
Subpages (1):
WiFi Sensor Configuration Guide