 In this tutorial you will establish radio communications between the Flex RF module and the Raspberry Pi Base Station. After this tutorial you will know how to send commands from the Raspberry Pi to the Flex RF module so that you can query sensors or configure the RF module. You will also be able to monitor messages coming from the sensor to the base station.
Background
Before we start, lets cover some of the theory behind what we will be doing. The figure below describes how the Raspberry Pi (or any other Microprocessor, like Arduino or BeagleBone) communicates with sensor nodes. In this case, the sensor node is the Flex RF Module. In this tutorial we will be performing something similar to a Ping Test where a computer is testing whether another computer is able to respond so that it can communicate with the other computer.
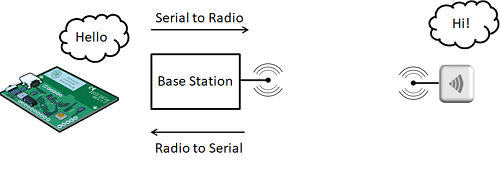 Following the above diagram the micro-controller (MCU) communicates with the base station through the serial port and the base station converts serial to radio and radio back to serial. The base station wants to send a “Hello” message to a sensor node on the right hand side. The MCU sends “Hello” to the serial port (Tx) and the base station receives the message through it’s serial port (Rx), then the base station transmits the “Hello” message over a specifi radio frequency to the Sensor Node, on the right, who receives the radio transmission and replies “Hi!”, which is received by the Base Station and sent back to the MCU through the serial port. A base station will process all messages coming in over the air and pass them to the MCU so that the MCU can process accordingly. As shown in the above diagram, messages sent to the serial port are transmitted over the air and messages received by the base station from the air are sent to the serial port. The Base Station is essentially a Serial-to-RF / RF-to-Serial converter.
Tutorial You will need the following:
Connect base station to the Raspberry Pi. We have a separate tutorial on this step, found here. And also make sure you have enabled the serial port on your Raspberry Pi.
Step 2 - Run the serial monitor application
python serial_mon.py 9600
You should see:
Sun Feb 25 01:23:15 2018 a01HELLO----
This is what happened: the serial monitor sent a "a01HELLO----" message to the serial port and the Base Station responded:
Sun Feb 25 01:23:15 2018 a01HELLO----
If you didn't get the above message then the Raspberry Pi and Base station are not communicating and you will need to retrace your steps.
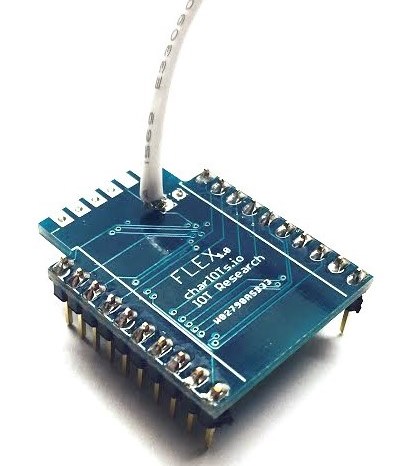
Step 3 - Power up the Flex Module
Sun Feb 25 01:39:09 2018 a03STARTED--Sun Feb 25 01:39:09 2018 a03STARTED--Sun Feb 25 01:39:09 2018 a03STARTED--Sun Feb 25 01:39:09 2018 a03STARTED--Sun Feb 25 01:39:09 2018 a03STARTED--In the next step you will confirm that you can send messages to the RF module and receive a reply to the message.
Step 4 - Ping Test. Send "Hello" from the Raspberry Pi to the Flex Sensor Node and receive a reply
python rf_config.py 03 HELLOWhere 03 is the id of the sensor node. From the STARTED messages you can see the id is 03. Only the sensor with an id of 03 will respond to this message.
You should see the following response:
sending : a03HELLOresponse is : a03HELLO----That ends this tutorial. You now know how to observe STARTED messages and do a ping test to the sensor to see if it is available for communications. You would normally do this as a first step before doing something more meaningful like sending a configuration change or requesting a sensor reading.
A video tutorial covering these steps can be seen here (click full screen so you can read the text):
|
 |
Home > Home Alarm System project > Wireless Projects > Wireless Sensor - FLEX RF Module > Flex Tutorials >