|
In this tutorial we will configure your Raspberry Pi to act as a motion sensor (PIR sensor) and trigger your alarm system.
You will need:
If you have not installed the alarm system, go to
www.privateeyepi.com
and click “New User”
on the top right.
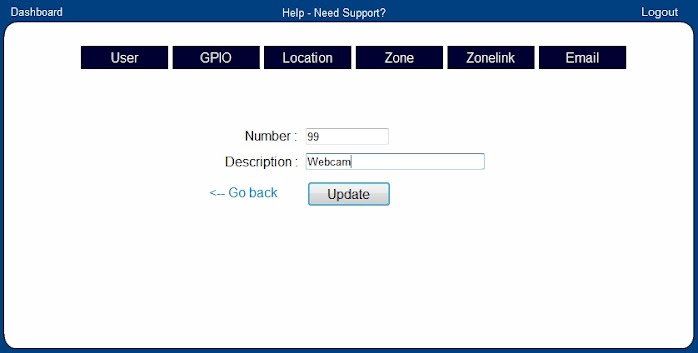
Add a new GPIO entry, but this time we won’t be using a pin number from the GPIO, choose any other number and remember it for later.
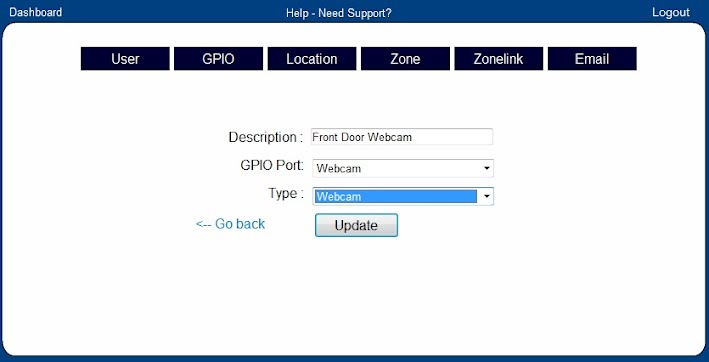
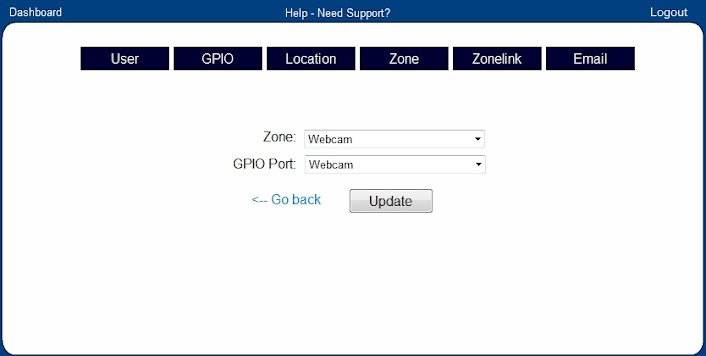
Add the location of the webcam and be sure to select “Webcam” type. Lastly link the location to an alarm zone, or link it to a new zone for the webcam.
The server configuration is complete, so now we move to the Raspberry Pi config. We’ve created a new python script that the “motion” webcam application will can when motion is detected. Download webcam.py from our website. At the Raspberry Pi command prompt:
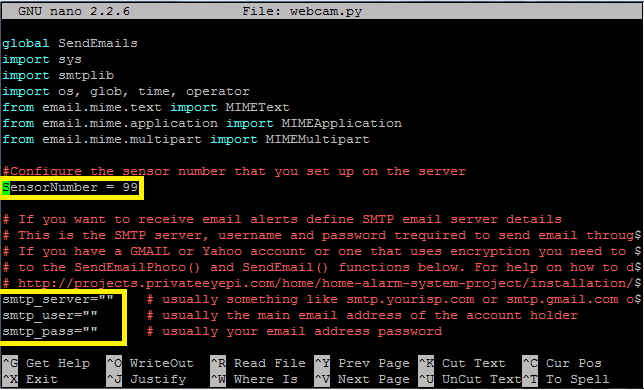
Firstly configure the SensorNumber variable shown in the diagram below. Set it to the GPIO Number you defined above (in this example it was 99). Next configure your email settings if you want to send email alerts. You will need to know your smtp server, username and password from your internet service provider or email provider (e.g. GMAIL, YAHOO!). There are instructions within the webcam.py program and there is more here.
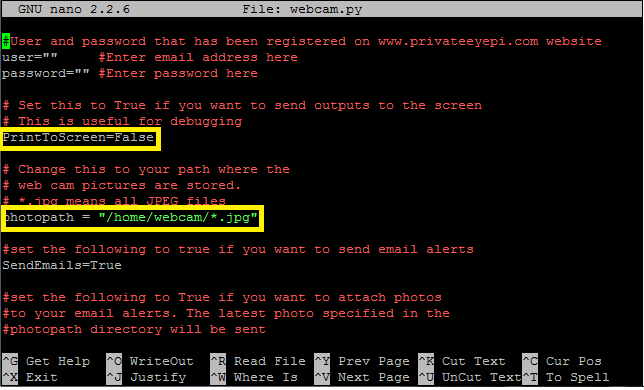
Next, set PrintToScreen=True. This will print more information to the screen so when you test it you can see what it is doing and whether it is working. Next, set the photopath variable to the directory where the photographs are located that the webcam is saving. If you do not want photographs attached to your email alerts then just leave this setting to the standard /home/webcam/*.jpg.
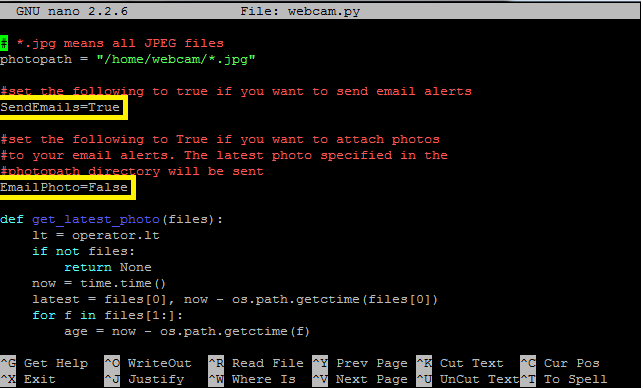
Lastly, if you do not want email alerts then set the SendEmails variable to False, and if you want photos attached to the email alerts set EmailPhoto=True.
Save the file by pressing CTRL-X , press Y, then ENTER. Test that the program is working by following the following steps: 1. Using the PrivateEyePi dashboard application arm the zone to which the web cam is linked. 2. Run webcam.py from the command prompt by typing the following: 3. Check the dashboard to see if the alarm was triggered, and also check if an email was sent to you (providing you set it to send you emails). Configure the “motion” application to call webcam.py when motion is detected.
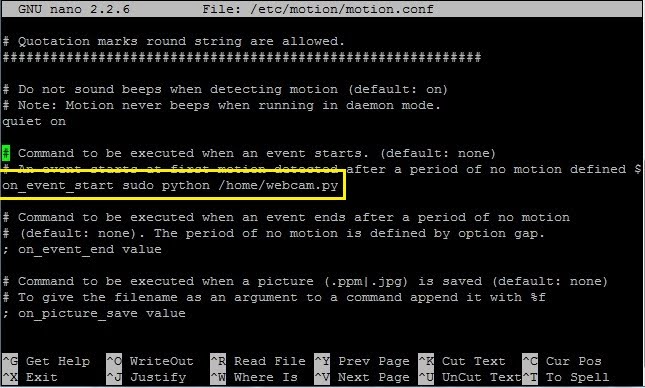
Search for “Command to be executed when event starts”, which is about 7 pages from the bottom of the file and edit is as follows: Save the file by pressing CTRL-X , press Y, then ENTER. Restart the motion application.
Test it is working by arming the zone on your dashboard and then creating motion in front of the webcam.
|
Home > Webcam Surveillance Projects >

